Prerequisites, installation in custom/, configuration, first test and update. Start on a copy of your database.
Updated 9 October 2026 · Dolibarr 18 → 24 · PHP 7.4 – 8.3 · version 1.1.0
1. Prerequisites
Dolibarr 18 to 24 with PHP 7.4 to 8.3 and the cURL extension. A Stripe account with access to the API keys. A Dolibarr server reachable over HTTPS from the internet, because Stripe calls the webhook. Work on a copy of your database first.
2. Install the module
Download the archive from Dolistore and unzip it into the custom/ directory of Dolibarr (custom/stripepaymentlinks). In Home → Setup → Modules, activate Stripe Payment Links. No Composer package or external library is required.
3. Enter the Stripe keys
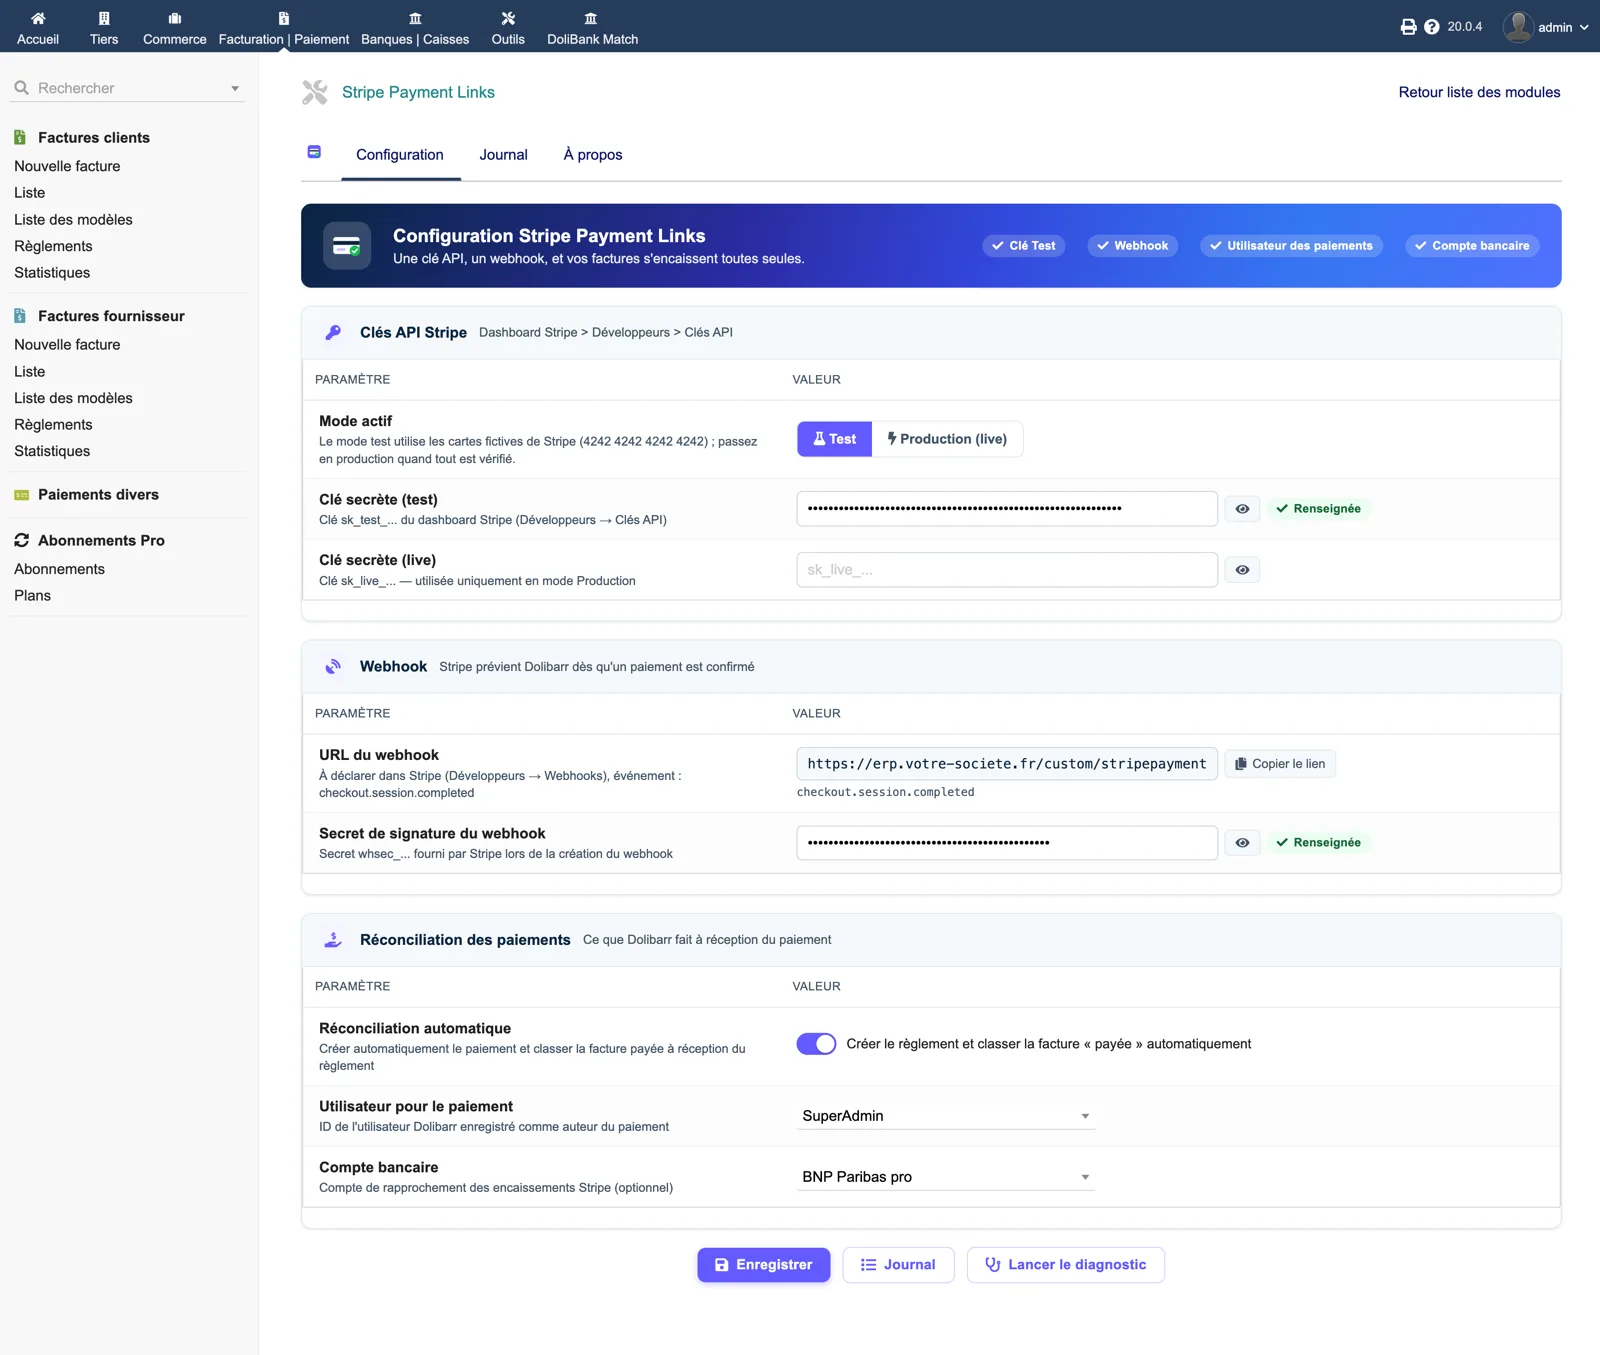
In the module setup, paste the secret key of the test mode, then later the live key. The keys are masked and stored separately. Choose the Dolibarr user under which payments will be recorded, and optionally the bank account for reconciliation.
4. Create the webhook in Stripe
Copy the webhook URL shown in the module setup. In the Stripe dashboard, create a webhook endpoint for the event checkout.session.completed with that URL, then paste the signing secret into the module. Save.
5. Run a test payment
Open a validated invoice, click “Generate Stripe payment link”, open the link and pay with the Stripe test card 4242 4242 4242 4242. Back in Dolibarr, the panel must show the payment and the invoice must be paid.
6. Check the diagnostic
The “About” page of the module runs twelve checks (cURL, HMAC, table, active key, webhook, user, bank). Every line must be green before switching to live mode.
7. Go live and update
Switch the selector to live mode and create the live webhook the same way. To update, replace the custom/stripepaymentlinks directory with the new version, then disable and re-enable the module.