Prerequisites, installation in custom/, configuration, first test and update. Start on a copy of your database.
Updated 9 October 2026 · Dolibarr 18 → 24 · PHP 7.4 – 8.3 · version 1.3.0
1. Prerequisites
Dolibarr 18 to 24, PHP 7.4 to 8.3 with the cURL and JSON extensions, the Invoices module and Factur-X France installed and producing a factur-x.xml on validation. For production: a PISTE application and a Chorus Pro technical account, a Pennylane API token, or the endpoint and key of your platform contract. Test on a copy of your database.
2. Install the module
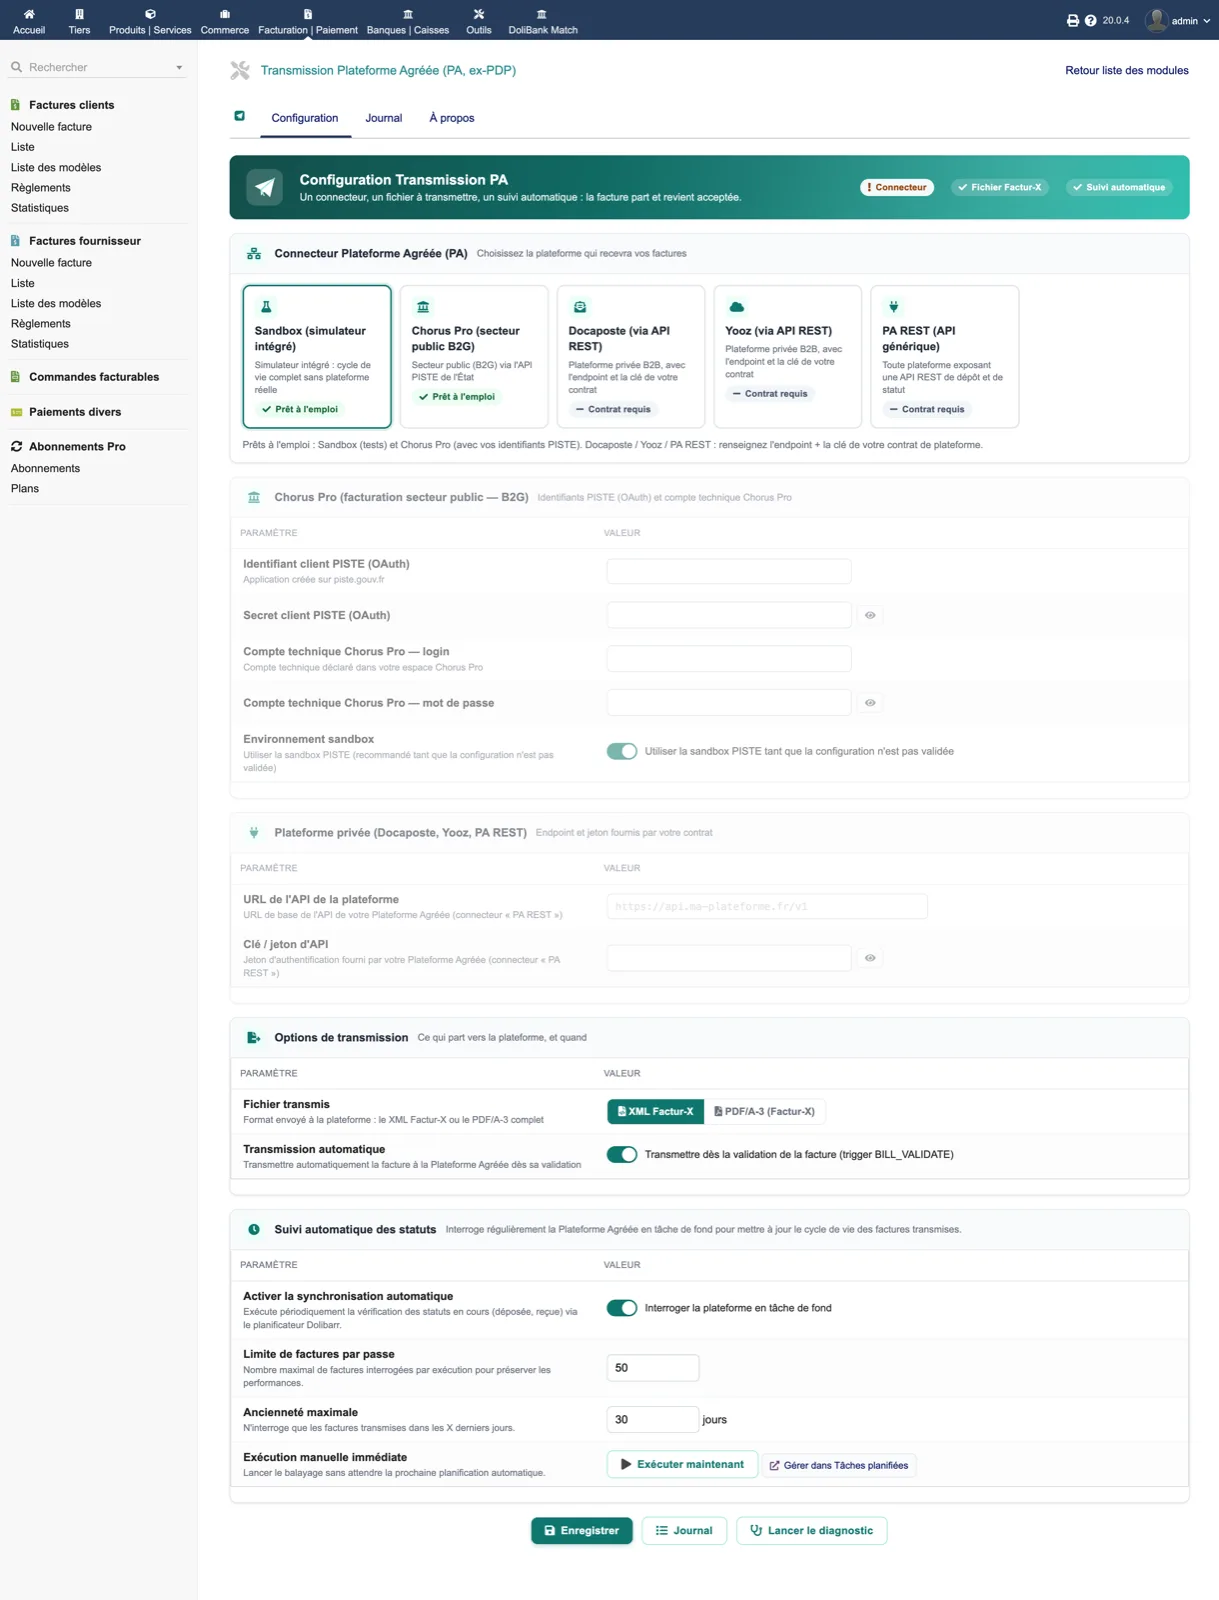
Download the archive from Dolistore and unzip it into custom/ (custom/pdptransmission). In Home → Setup → Modules/Applications, activate PA Transmission. Then open its setup page: the readiness banner tells you what is still missing.
3. Start with the sandbox
Leave the connector on Sandbox (built-in simulator). Open a validated invoice whose Factur-X file exists and click “Transmit to the PA”. The panel must show “Submitted” and a platform identifier starting with SBX-. Click “Refresh status” until it reaches “Accepted”, then unfold the audit trail.
4. Configure the real connector
Choose Chorus Pro and enter the PISTE client ID and secret and the technical account login and password, keeping the “Sandbox environment” switch on at first. For Pennylane, paste the API token generated in Management → Settings → Connectivity → Developers (scopes e_invoices:all and customer_invoices:all). For Docaposte, Yooz or PA REST, enter the API URL and the key from your contract. Choose the transmitted file: Factur-X XML or PDF/A-3. Save.
5. Enable background tracking
In “Automatic status tracking”, switch on the synchronisation, set the limit per run (50 by default) and the maximum age in days (30), then click “Run now” to test. Dolibarr’s scheduled jobs module must be active; the “Manage in scheduled jobs” link opens the job.
6. Run the diagnostic and a real test
On the About tab, every diagnostic line must be OK except, at most, a warning on the sandbox connector. Send one real invoice with the chosen connector, check that the status comes back received then accepted, and read the reason if it is rejected. Only then enable “Automatic transmission”.
7. Update
Replace the custom/pdptransmission directory with the new version, then disable and re-enable the module so that new tables, constants and the scheduled job are registered. Transmissions and their history are kept. If a transmission fails, the reason is in documents/pdptransmission/ and in the Journal tab.